Movember Moustaches to print! Print and cut, and stick each moustache to a straw or craft stick for the kids to hold in front of themselves for dress up!
Craft Ideas
Craft Ideas: Nine Crafty things to take and do while camping
We try to squeeze in some camping over the summer months to get our fill of water time, marshmallow roasts, hiking and biking. But there are also times when we just feel like hanging around the campsite enjoying the beautiful shade of the forest from our lawn chairs. Quiet time at the campsite is a great time to pull out some activities for the kids, and we’ve got a few crafty ideas to recommend:
- Drawing Supplies – a sketch pad and pencil can lead to treasure maps drawn, stories written, leaf rubbings made, games played (such as tic-tac-toe) or, perhaps most obviously, inspired drawings


- Paints and brushes – gathered sticks and rocks can become art forms as they get a coating of bright paint from the kids. Transform rocks into bugs or animals, and sticks can become wands.
- Wikki Stix – an easy portable activity, these wax covered strings can bend into any shape and can be used by themselves on a playboard, and could even be wrapped around a found rock or twig to give it a shock of colour

- Collage Boards – our kids spent over an hour searching for just the right foliage to adorn their butterfly boards. Also try sprinkling sections of sand on these for a beach activity

- Masking Tape or painters tape – mask out a giant x & O board in the dirt, and find some sticks to mark X & O. Then ‘erase’ your game and start over again. Or, make a nature walk bracelet by putting a piece of masking tape sticky-side-out around your wrist. Collect little treasures such as leaves and twigs to add to your nature braclet
- Sunpaper – this is one of our favourites for summer, whether at home or out camping. Find a pretty leaf or flower, add a ray of sun and a sprinkling of water, and watch these prints come to life.

- Fort building supplies – Clothes pins and string aren’t only for hanging laundry to dry! A good nook of trees can be transformed into an uuber cool fort with the help of some towels or blanket secured with clothes pins on a line.
- Building supplies – we have a bin of building blocks that comes on every single camping trip and gets used on a blanket outside, or under cover if we’re hit with rain
- Leaf Press – collect samples of your favourite trees or flowers (if permitted by the park) and store them between the folds of this leaf press. Patient campers will have pretty mementos to add to scrap books or to use with other craft projects.

Five Things to Ask For on Mother’s Day
We love it when kids get crafty to make something special for Mom on Mother’s Day, and you can find some great Mother’s Day craft ideas here.
BUT, we also realize that unless a teacher or caregiver has a Mother’s Day craft plan for the kids, they might have difficulty getting started without a lot of help from Mom, which can be tricky when the whole point is to make something for Mom!
If you’re pretty sure the Mother’s Day crafts just aren’t going to happen unless you do them yourself, here are Five Things To Ask For on Mother’s Day:
A Letter from Each of Your Children:
Everyone loves getting letters, so imagine how wonderful it would be to amass a whole collection from your kids as the years go by. Turn this into an annual tradition and not only will you have a yearly record of their growth and your Mother-child relationship, but you’ll also be training them to write a letter at least once a year when they’re grown and out of the house!
Prewriting kids can draw a picture, trace their hand, or make a comic strip (with a little help captioning). You can also ask them to write a letter, give them pencil and paper, and see what they come up with. There are always stories behind early scribbles, so make sure you ask what the letter says or shows, and write it down as a caption at the bottom of the page.
Mom or other caregiver can encourage the kids with story starter phrases that can be drawn or written. Examples might include: I love my mommy because…., This is mommy and me when….., my favourite day with mommy, etc

High Tea at Home
The kids will need to enlist the help of Dad or other caregiver for this one, but the good news is that it qualifies for last minute Mother’s Day fun even if you don’t have a reservation! Make High Tea an event at your house and get dressed up, preferably with an awesome hat, to make it extra fancy.
Set out a tiered tray so that kids can make little sandwiches or wraps for the bottom tier (peanut butter and jam, ham and cheese, or cucumber are a few easy ones!), an assortment of fruit, veggies, and cheese for the middle tier, and a few treats for the top tier (such as scones, cookies or mini cupcakes). The kids can also put a teabag into a pot for Dad or caregiver to fill, and they can use another container for a fun kid-friendly drink like chocolate milk, spritzer, or juice.
If you don’t have a tiered tray, a big platter or dainty plates would work just as well. If it’s a beautiful day, find a picnic blanket and a spot of sun and take your tea outside!
A Picture of Mom with the Kids
This is another idea that we think should be an annual tradition, especially because Mommy is usually the one behind the camera! Ask your partner to take a picture of you with the ones who turned you into a Mother! Get serious or silly and strike a pose with the kids so that you have an annual photo with your little sweethearts. When you get around to downloading your photos, send your Mother’s Day photo to a printer and make copies for you and your kids. Put the photos into a scrapbook or picture frame – an easy way to smile every time you walk by.
Reading Time for Mommy
It’s likely that you spend a lot of time reading stories out loud to your child, so Mother’s Day is the perfect time to change up story time! Choose a book, newspaper or magazine article, or other reading material for your child to read aloud to you (ensuring that the content is rated ‘G’ of course!). If your child can’t read yet and is into picture books, pick one of their books for them to narrate in their own words or ask them to tell you a story about a subject that interests both of you.
Mommy’s Choice Craft Time
We know that little ones get a lot out of the experience of making or doing something, and it’s important for adults to remember to play too, so Mother’s Day is the perfect day to make or do something with your child. Mother’s Day means mommy’s choice, so choose your favourite activity and get the kids involved. Have your child work along side you on their own projects, or deem them your special helpers. Scrapbooking, knitting, going on a bike ride, or gardening are just a few examples.

Craft Idea: Make a three-dimensional paper snowflake
Make this beautiful three dimensional snowflake to hang in the classroom or at home! This is a good activity for kids to do with their caregivers. Caregiver or teacher will need to assist with stapling. You will need:
- Six equal sized pieces of square paper
- Scissors
- Ruler
- Glue stick or tape
- Stapler
What to do:
- Fold all six pieces of paper into triangles. Starting at the folded edge, draw parallel cutting lines that extend from folded edge to centre of triangle. Make sure your cuts stop just before reaching the centre of triangle so that the paper remains a single piece

- Cut along the cutting lines and then unfold the paper. Find the loose corners of the smallest square on your paper, and bring them in together, taping to secure

- Flip your paper over, and bring the next set of corners together, again taping to secure

- Continue flipping paper and bringing corners together until you have completed the square. Repeat for other 5 squares

- Hold ends of 3 snowflake pieces together, and staple through ends. Staple through sides of snowflake pieces where each piece touches the next one. This will keep your finished snowflake from flopping over

- Staple together all six ends to complete your snowflake. Use a piece of string to hang from the ceiling, or tack or tape to the wall.

Craft Idea: Super Simple Snowman Paper Chain
Make this super simple snowman chain and then decorate it with an assortment of craft supplies! Make lots of these chains with a group of kids and then string them together around the room for a winter wonderland!
You will need:
- thin white paper (we used an 8.5 x 11 piece of printer paper)
- pen or pencil
- small circular object and larger circular object to trace
- scissors
- decorating supplies
What to do:
- Cut 8.5 x 11 paper in half length wise, and tape together end-to-end, making a 4.25 x 22 ” piece
- Trace large cicle and then small circle at one end, to make a snowman shape. The edge of the large bottom circle should be right at the very edge of your paper

- Fold paper zig-zag style to the end, with edges of paper lining up with edges of large bottom circle

- Cut through all thicknesses, making sure to leave the edge of your large circles uncut where the snowman bodies will meet each other.
- Unfold to reveal your snowman paper chain. Decorate with various craft supplies

Craft Idea: Popsicle stick (craft stick) snowflake
Make a snowflake by winding yarn around craft sticks! Fuzzy yarn, or yarn with some sparkle or shimmer will make your snowflake twinkle as it hangs on display!
You will need:
- 3 craft sticks (popsicle sticks)
- white or ‘snowflake’ coloured yarn
What to do:
- Lay craft sticks across each other so that they intersect at the middle and fan out in a star shape at the ends. Consider gluing craft sticks in place so that it’s easier for little people to get started with the yarn winding
- Holding craft sticks in place, loop yarn around first craft stick where all sticks intersect, and then move yarn to second stick. Loop around second stick and move to third stick, looping and continuing around the middle of the snowflake.

- Continue looping yarn, working around in a cirlce and moving towards the outside edge of craft sticks.

- When you reach the outside edge of your snowflake, loop and tie yarn to end of one of the craft sticks. Snip end, leaving enough yarn to make a hanging string for your snowflake

5 Hibernation Themed Activities for Kids (okay, 6)
The November Kids Craft Club theme is hibernation, and we’ve got some great ideas to share with the kids!
- Build a blanket fort or den – classic rainy (or snowy!) day activity, when we often do feel like hibernating. Sometimes these forts entertain for the entire day at our house! Add a comfy duvet or blanket floor, along with a fort door and a ‘Hibernating’ sign. The kids always get a kick out of this easy activity and all you need is chairs, blankets, and a little space. Tip: before they get started, remind the kids that whoever builds it must help take it apart too!

- Make some animal masks and role play hibernation – use your Kids Craft Club package to get started. Extend your fort/den play by becoming a hibernating animal! Use craft supplies to become a tired bear, raccoon, hedgehog, or even a bat. The kids can collect food for the winter, hibernate, and wake up when someone declares that spring has arrived!

- Sensory Box: make a hibernation nest – small animals that hibernate, such as hedgehogs, will build themselves nests to snuggle into for the winter. They use leaves, dried grass, and other available vegetation to build their nests. Go on a nature hunt to look for small items that might be comfortable in a nest. Add them to a shoe box or basket to make a comfy nest. This could be a bed for a small stuffed animal, or you could also search for pinecones or large seeds that could be transformed into a small hibernating animal with the help of some stick-on eyes! We found some chestnuts and turned them into little critters. Tip: extend this activity by talking about animals that hibernate in nests, and deciding what kind of animal your critters most look like. Another idea: cover your little critters with more leaves and ‘bedding’ and when it’s time for them to wake up, the kids can dig through the leaves to find them.


- Do a hibernation experiment:
- before hibernating, animals spend a lot of time eating to create excess stores of fat for insulation. Here’s a simple experiment to see how that extra layer keeps them warm: have your child wear a glove or mitten on one hand, giving that hand an ‘extra layer’. Place ice cubes in both their gloved hand, and their bare hand. Which one stays warm? Which one gets cold? Why?
- Animals Hibernate to survive through harsh winter conditions. One of the ways they get ready for hibernation is by building a shelter or nest. Have the kids lay down and pretend they’re hibernating, without going into any extra shelter. Plug an electric fan in and point the air flow at the children. Now have the kids go into their fort or den to hibernate. Again point the fan air flow at the kids, who are now protected by the walls of the den. Do they stay warmer in the den than they did without the den? Why?
- Plant a winter bulb – use winter dormancy in plants to help explain winter hibernation in animals. Bulbs, tubers, perennials and trees sit quietly over winter, and then ‘wake up’ again in the spring. Demonstrate this sleeping-waking similarity by planting bulbs. Plant your bulb in it’s ‘nest’ of dirt, keep it in a cool place over the winter, and watch for signs of it ‘waking up’ in the spring. Here’s a ‘how to’
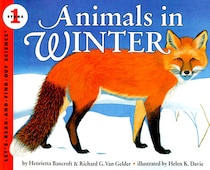
- Read some hibernation books – our top 3 picks:
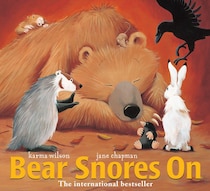

Bear Snores On By Karma Wilson
Illustrated by Jane Chapman
Time to Sleep Written and Illustrated by Denise Fleming
Animals in Winter By Henrietta Bancroft
Remembrance Day Crafts – Three Poppy Themed Crafts for Kids
Remembrance Day is November 11th. Here are three fun poppy crafts to help get the kids engaged in Remembrance Day:


Crafty Ideas: Three Ways to Craft Spring Flowers
- Make a Peony or chrysanthemum with tissue circles or squares. Simply stack 4 to 6 small tissue squares, pinch together in the centre, and secure by wrapping the pinched end with a green chenille stem. Fluff out the tissue once secured.

- Make a tulip from folded paper – use origami (for big kids), or try the simple fold/cut/paste method found here

- Make a daisy from coffee filters or cupcake liners – stack a number of liners together and glue in the centre. Snip around liners to make petals. Add a bright paper circle to centre and secure stem with tape or glue

Crafty Ideas: Three Easy Valentines Day Crafts
1. Heart on a String
The picture says it all:

2. I Dig You Valentine
This one would be great for little boys in particular! Use blue or green hearts instead of pink or red if your little guy prefers. We made a black shovel, but your kids might choose a brighter colour similar to the bright plastic sand shovels every child owns.
You will need two colours of construction paper, glue, scissors, and a marker,crayon, or pencil crayon for this craft.
 |
1. Make the scoop of your shovel – from black construction paper, cut a rectangle. Trim the rectangle so that bottom edge is slightly wider than top edge. Fold top and sides over to give your shovel some dimension. To do this, fold the edges, snip the intersecting corner, and glue edges together.
2. Make your shovel handle – cut a long thin rectangle from construction paper. Fold it in half to make it appear thicker. Fold the end of the rectangle over to glue to edge of shovel scoop 3. Cut out a heart in the same colour as your shovel to make the top of your handle. Glue heart in place |
4. Cut out a heart in contrasting colour. Write the message ‘I dig you Valentine’ in the heart. Glue into scoop part of the shovel
Tip: to simplify, simply draw a shovel shape and cut it out in one piece, omitting folding for dimension. This could be good cutting practice for little ones!
3. Frilly Fancy Heart Valentine Card
 |
You will need cardstock or construction paper, one piece of facial tissue, scissors and glue for this craft
1. Cut a large heart shape from your cardstock or construction paper 2. Fold facial tissue in half and cut a small heart along fold line. Glue to centre of large heart |
3. Cut another heart shape around space where small heart was cut, and discard. Then cut a third heart shape around the space, making it bigger than smallest heart but smaller than your large construction paper heart. Glue onto card
4. Make your frilly edge – tear strips of facial tissue. This is easy to do by folding the tissue along it’s natural fold line, and then tearing from fold towards open edges of tissue. Once you have several strips, make a line of glue all around your large heart edge. Place end of one tissue strip along glue line, and then push the rest of the tissue onto the glue line. Continue pushing tissue strips onto glue, making a frilly edge.